Thursday, May 29, 2014

Kitchen Remodel: Inspiration

Image via Sycamore Street Press


Hello All!

Since this past weekend was a 3 day weekend, Adam and I decided we were ready to dive head first into our kitchen remodel. We know this will be no easy task, but we are really trying to get our house in tip-top shape before my nephews birthday party in July. Plus this is something we've been talking about since the day we bought our house. We've already made a lot of progress, but it will be about a month (hopefully!!) before I'm ready to show pictures of the new look.

Here are a couple of before pictures from our home listing:


Some people may really like the kitchen in its former state, but I'm not one of them. Here are a few things that really bug me about this kitchen:

1) I despise those ugly brown walls. Not only because it is an ugly color, but it also really darkens the whole room. It is hard to tell in these pictures because of the flash, but just trust me. It is true.

2) Those cabinets. I'm just not a fan of the color wood they chose and the only thing that makes them worse is the matching door pulls. 

3) The light fixtures. They just do not match the time period of the house. They are way too modern for what I'm going for. 

4) The floor. Since we have giant messy dogs, this light grey floor just does not work for us. Plus, you can't tell in the picture, but most of the tiles are either cracked or loose. This is on our list of projects, but I don't think it will be finished until probably next year sometime (if not a little longer).

So there is plenty more that really bugs me about this kitchen, but I won't go on and on about it. I'm sure you get the point. 

Here are some amazing pros to this kitchen:

1) The giant windows. They let tons of light in, but you can't tell because the walls darken it so much
2) Tons of cabinet and counter space
3) A great layout that makes it easy to enjoy cooking.

So that's enough about the current state. Let's move on to the big plans I have for this room!

Since our home is almost 100 years old, I really want to keep an industrial feel without getting too modern. I want an update, but not something that will feel weird in such an old home. Here are a few pictures of what inspires me:

Image via Elements of Style
I absolutely love this kitchen. It is sleek and modern, but not TOO modern. It is rustic and a little industrial and I love it.

Image via Nordic Design
I love the light fixture in this picture. It is fun and interesting and will add much more light than our current fixtures. 

Image via Remodelista


I love the use of plants in this room. It really brings new life and color to the whole space. 

So to wrap this up, here are my goals for our new space:

1) I want to brighten the space
2) I want to incorporate wood and iron elements
3) I want lots of plants!

Check back in several weeks and I should have a progress report for you. Between now and then, expect lots of DIY posts for kitchen projects!

xo-Nancy


Wednesday, May 21, 2014

Etsy Love: Planters

Oh how I love spring!

I don't know about you guys, but for me, spring seems to bring a new burst of motivation for new projects and remodeling. I have been spending tons of time lately in my flower beds and my garden and I've been trying to bring all of that greenery inside so I can enjoy it ALL the time.

Unlike other decor, plants are something special to me. They add more than just color and variation, they bring life inside. Maybe that sounds crazy...I'm not sure. But anyways, one of the fun things about bringing plants inside is finding creative ways to display them!

Here are a few really fun planter ideas I found on Etsy.

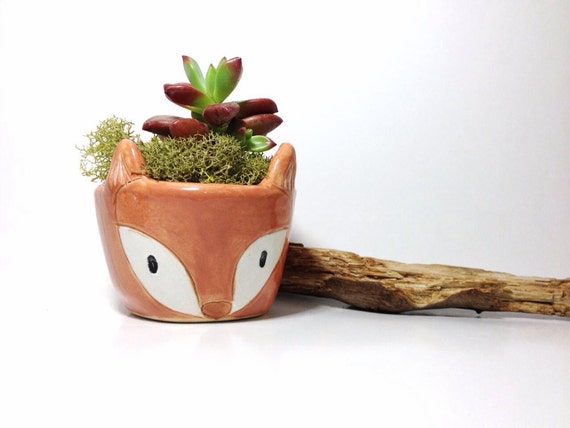
How adorable is this fox planter? Perfect for a bookshelf or in a grouping of other plants. 

This dino planter is bright and fun! 


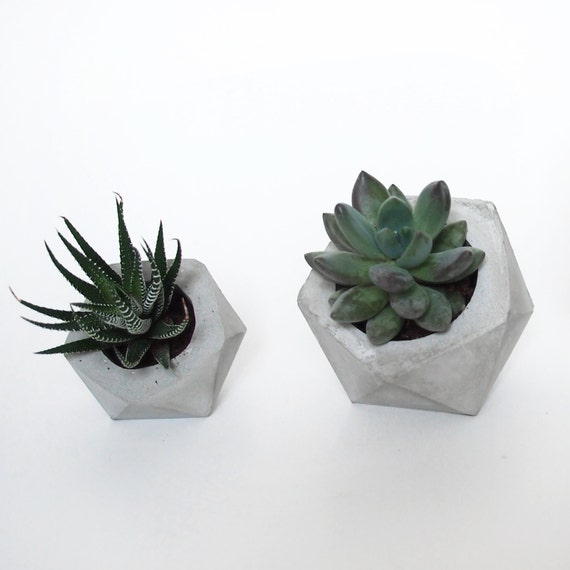
 I've really been getting into industrial type styles lately, so this geometric concrete planter really works with my current style.


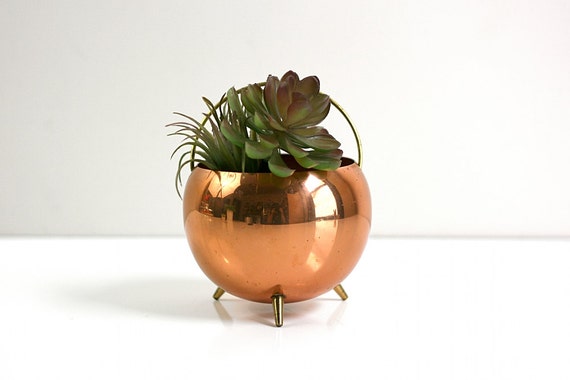
And finally, a pretty mid century planter. You can never go wrong with vintage.

These are just a few things that I'm loving on Etsy right now. I also have a few planter DIY projects I'll be posting in the next few weeks, so be sure to check back to see what I've made! If you are looking for a super quick project to hold you over, check out these painted terra cotta pots I made awhile back.

Happy planting!

xo-Nancy


Monday, May 19, 2014

DIY: Industrial Towel Rack


Hello! Today I am really excited to share our latest project with you! It is one of those projects that is fairly easy, not very time consuming, but has a major impact. Definitely my favorite kind of project!

First, let's talk about supplies.

Here is what you'll need:

6- 3 1/2" Black Steel Pipe Nipples
6- Black Steel Floor Flanges with 1/2" openings
6- 1/2" Black Steel Caps
24- 3/4" Screws for Floor Flanges (I also call them "bases")
2+- Mounting Screws
*We used 3, but if you use a longer/shorter board, adjust accordingly :)
Power Drill
Screw Driver
(either/or will do, but the drill makes this job a lot easier

To begin, we first measured where we wanted to place each of the hooks so they would be evenly spaced. Our board (after cutting) was 45 3/8". Since we had 6 hooks, we divided the board into 7ths so that there would be even spacing on both ends and between each of the hooks. Our final measurement was a hook every ~6.5". If you are using more/less hooks or a longer/shorter board, just use the same math as above to come up with your spacing.
If you look closely at the board, you can see the holes for the mounting screws and the markings for where the bases were to be mounted.

We chose to use these screws mainly because they were pretty. You can use whatever you'd like as long as the heads are big enough to not slip through the holes of the bases.
Make sure to put on some good music while you work! We were listening to our Boston record that we are currently obsessed with.

After measuring and marking the board (we set each base on the board and traced the holes so we would know where to drill later), we took it to the bathroom and measured where the studs were. We went ahead and drilled the holes in our board for the mounting screws so we could make sure that the hooks didn't cover the holes. We found that one of the screws would be under one of the hooks, so we knew we were going to have to wait to screw that one down until after the rack was mounted (more on that later). 

Now that we had everything laid out, it was time to start mounting the bases. We just realigned the bases with the marking from earlier and started screwing them down.


You can use a power drill for this part and it will go a lot faster. We started with a screw driver because we didn't have a flat head drill bit, but we ended up "making one" because we were lazy.


After you get the base screwed down, you can go ahead and screw in the other pieces. We went ahead and screwed down all the bases at once before we put the rest of the pieces together.

Here is my other "helper"


You can tell from the picture that one of the bases isn't mounted yet. This is the one that was going to cover one of our mounting screws. We just left it off until we had the whole thing mounted on the wall. We made sure the board was level and then just screwed it into the studs to make sure it wasn't going to fall later. After we assembled the caps and nipples to the bases, we went back with a pair of channel locks and tightened them even further. This step probably wasn't necessary, but we did it anyways.

 Here is the final product!


I'm totally in love with how it turned out! I was worried that the wood wouldn't match our bathroom because we don't really have much natural wood in there, but it was perfect. It added some much needed character to our otherwise boring bathroom. 

So what do you think? Let me know in the comments and if you decide to make one of your own, I'd love to see it!

xo-Nancy