Saturday, March 17, 2018

Tulum: What I Loved and What I Learned

When I started planning our Mexican road trip, I knew I wanted to go to Tulum. I had heard so many good things about it and I saw so many beautiful pictures while I was browsing. I started researching and planning and found the most amazing airbnb to stay in and I booked our scuba dives to finish our PADI certifications. I just knew everything was going to be perfect. 

I should have known better. If there was one thing I learned from our travels in Mexico, NOTHING will go as planned. It just won't. I also learned that it will all be fine. Just make sure to plan extra time into your trip and don't try to have a crazy tight schedule. When we were driving from Playa del Carmen to Tulum, we decided to check into our cabaña before heading to the cenotes just to make sure we didn't have problems. It was smooth sailing all the way. I had downloaded offline google maps before we left and I was watching the map and we were so close...and then we couldn't find it. We parked and we walked and we asked...but nothing. We had zero cell service and I didn't know what to do. Eventually we found someone who had heard of the place and it turns out we had to go another mile down the beach road. After 2 hours of driving up and down the beach road, we finally made it. We were so emotionally exhausted that we scratched all of our plans to visit cenotes and just sat on the beach and drank margaritas and ate ceviche instead. This was just one of the many things I wish I would have known before our trip. To make sure no one has to go through the same things we did, I've made a list of things we loved and things we learned.


What we Loved


Wandering the town

I really loved the town of Tulum. There were so many hidden gems off the main road. We found the most amazing restaurant that not only had good craft beer, but they also had fantastic food. I was tempted to go back multiple times. 


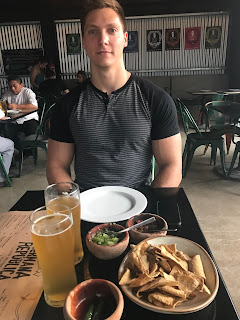
We wandered into Parque Dos Auguas and it was really cute. They had lots of street food stands and it was pretty busy. It felt more local and off the beaten path. If you've never tried elote or marquesitas, I would highly recommend trying both. Elote is corn on the cob with spices and cheese and is oh so tasty. Marquesitas are kind of like Mexico's version of a crepe, except it is rolled up and stuffed with goodies. You can pick what goes in it, but the locals like nutella and cheese. Of course you can never go wrong with churros or tacos. On the other side of the park we found a paletas shop which was also great. Paletas are a Mexican frozen treat made with fresh fruit, vegetables, nuts, and other ingredients. They are the perfect snack for a hot day. While you are eating your snacks, you can go watch people play soccer at the soccer fields around the corner. The moral of the story is get off the main road and wander the side streets. There are a lot of hidden gems just waiting to be discovered.


Tulum Ruins


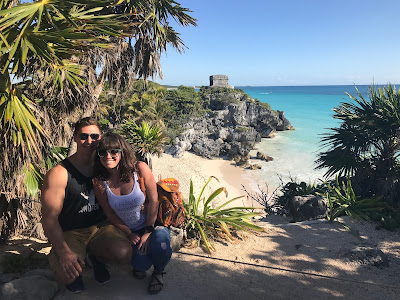
We have been to our fare share of Mayan ruins over the past few years, but the Tulum ruins were probably the most gorgeous ones I've been to. If you've never been to any Mayan ruins before, I would recommend getting a guide. You learn so much about the history of the Mayans and what all the structures mean. The go even deeper and explain the math behind everything and what all the symbols mean. It is really mind blowing learning about how much thought and time they put into everything they ever built. If you think this sounds like something you want to do, don't worry about booking a guide in advance. There are plenty at the entrance offering their services as the tourists roll in. 

For these ruins, we didn't get a guide because we knew we wanted to splurge on one at Chichen Itza. It was still wonderful. We decided we wanted to get to the ruins as early as possible because we wanted to beat the heat and the crowds. We didn't get there quite as early as we wanted, so the crowds were already piling up. It was hard to get great pictures without having droves of tourists in the background. Had we gone any later, I think it would have been nearly impossible to maneuver though the site. My suggestion would be to get there as early as you can. It is a gorgeous site and you don't want to let the droves of people to take away from your experience. 


Our Cabaña


When we travel, we almost always use Airbnb to find our rooms. Our room in Tulum was the first one we booked when I started planning our trip to Mexico. It was absolutely gorgeous. It was right on the beach and we could hear the waves at night. It was so peaceful. It wasn't luxurious and honestly, it was probably only one step above camping. 

View from our room 😍

There isn't any fresh water, so the employees have to refill the water tanks every morning. If you try to shower before they do this, there is a chance you could run out of water. There is very limited hot water and the shower water is extremely salty, so I still felt kind of gross even after a shower. They also only run off solar energy. This means if someone is using a lot of power in the night time hours, it can run out before the sun comes back up. There also wasn't any wi-fi and very limited cell service, but it was kind of nice to completely disconnect from everything for a few days. We are very low maintenance people, so for us, it was the perfect place to stay. If this sounds like something you'd enjoy, you can check it out here. If you've never used airbnb, you can use this code to save $40 off your first stay. 


Even though this wasn't a high-end or luxurious place, the views can't be beat. Just looking out our window or sitting out or porch, we had a beautiful view of the beach. There are lounge chairs out by the water and a bar that serves homemade food (their ceviche is AMAZING!!) and good drinks. Since it is pretty far down the beach strip, the beach is mostly empty. It is so quiet and serene. Everyone who worked at the hotel was very nice and accommodating. They felt like family by the end of our stay. Also, you can't get a better view of the sunrise. Staying here was one of my favorite parts of my entire trip. 


What We Learned

Now that I've talked about my favorite parts of Tulum, I need to talk about things we wish we'd known before visiting. Had we known, we probably would have planned differently. 

Tulum town and Tulum beach are VERY different. 


When I was planning our trip, I had read that Tulum town and Tulum beach were different. When you look at them on a map, they look pretty close together and it seems like it would be easy to get to both. If you stayed on the town end of the beach road, you could easily ride bikes back and forth. We were about 5 miles down the beach, so it would have been a long bike ride for us, especially with all of the traffic. Even though I loved the beach, I really loved the town. The beach area is mostly boutique hotels with a lot of tourists on yoga retreats and vacations. It has been designed to appeal to this crowd. Even though this area has its own appeal, it wasn't what we were looking for personally. The town was more appealing to us. We were able to find areas that we really loved that didn't feel quite so touristy. I know we ARE tourists, but I don't like staying in a place that feels just like home. I like to experience as much of the local flair as I can. If I were to start over and plan another trip, I would book two separate places. I would stay in town for the days that we needed to be there, and then I would pack up and move to the beach for a couple of days. If you don't like to move around a lot, try to stay closer to town. 


There is only one road.


When you look at Tulum on a map, you can see that there is only one way in and one way out of the beach area. This isn't completely unusual for a remote location like Tulum. A few years ago, I would bet it wasn't even an issue. However, over the past few years, Tulum has gotten a lot of publicity and is no longer a hidden treasure. This means the traffic up and down this road is TERRIBLE. I loved our little cabaña, but had I known how bad the traffic was, I probably wouldn't have stayed so far out of town. I loved the rural location, but since we had to travel into town every day for scuba diving, it got really tiring going back and forth. If it was really early in the morning, we could make it to town in 20-30 minutes. If it was later in the day, sometimes it took us over an hour. We were only about 5 miles from town, but the commute was long and brutal. If you have to commute back and forth every day like we had to, I would recommend either staying in town and commuting to the beach in your spare time, or stay on the town end of the beach trip. This will cut down on your commute quite a bit. 

Tulum can be expensive.


When people think of mexico, they generally tend to think about how cheap it is. Normally, this is true. However, if you aren't careful, it can get really expensive really quick. After one of our diving days, we went to lunch with one of the guys from our dive. Lunch turned into happy hour and happy hour turned into all night. By the time we left, our tab was through the roof. We spent more on drinks and food that day than we did all of the days combined leading up to that day. I was frustrated, but I wouldn't say we regret it. We met some really fun people and it was one of the most fun nights we had on our entire trip. If you are on a budget, I would stay away from eating and drinking on the beach. The prices are much closer to what you'd expect in the USA. If you are on a budget, you would be much better off eating in town. Even nicer places in town are more affordable than mediocre places on the beach. 


Overall, we loved Tulum and I could see us going back one day. If we ever go back, we will definitely plan differently than we did this time. Hopefully anyone who is thinking of taking a trip will learn from our mistakes. 

xo-Nancy

Friday, March 16, 2018

4 Things We Loved About Playa Del Carmen


Playa Del Carmen is a fun town. Normally we don't go to super touristy places. They tend to be overwhelming, and it doesn't usually feel like an authentic experience. Since it was New Years, we thought it would be a fun place to spend a couple of days. We had a blast and I'm so glad we decided to venture out of our norm because we have some wonderful pictures and memories. 

Here are 4 things we loved about Playa Del Carmen


1. Beautiful street art


In pretty much every city we visit, I love to look for fun, colorful street art. Playa del Carmen did not disappoint and we didn't have to look very hard. Around just about every corner, there were murals or fun designs painted on buildings all over town. Some were small and some were massive. I knew Tulum had a lot of great art, but it was a pleasant surprise when we found it in Playa as well.


2. Getting off the main strip


Like most people probably do, we started our trip on the main tourist strip. Since it was New Years, it was extremely crowded and quite frankly, it was overwhelming. Most of what we saw were tourist shops, chain restaurants, and clothing stores we have at home. To get away from the chaos, we wandered down some of the side streets and found little places that weren't as crowded. Not only were they not as crowded, they were much cheaper! We spent our evening in a tiny bar (I wish I remembered the name) on a side street that was basically deserted. We made friends while we were there and it felt a little bit like home. It was the perfect evening.


3. Our Airbnb


Our cute little Airbnb was an oasis hidden from the hustle and bustle of the town and the new years festivities. We had a cozy balcony that overlooked a serene garden. When we needed to get away from everything, we'd sit outside and drink coffee in the morning or have afternoon beers before heading back out for dinner. It was the perfect way to reset before going back into town. 


In general, I feel like we get a more personal experience when we get out of the hotel zones and stay in local neighborhoods. Airbnbs have really changed the way we travel. If you've never tried Airbnb, but have been thinking about trying it (I highly encourage it!!), here is $40 off your first stay. Just use this link to get the discount. Also, no one tell my husband I put this picture on here. He would kill me! I just couldn't help it because I love this patio so much. 

We stayed really close to the airport, which was surprisingly nice. It was out of the super touristy areas, but was still very walkable. There were grocery stores nearby and there was a bank about two blocks away which made getting cash out of the ATMs really easy.It was also nice that all of the food options were much cheaper. 


4. Street Tacos


We ate a lot of food on our trip, but the thing I miss the most are the street tacos. This isn't just advice for Playa Del Carmen, but it held true in every town we visited in the area. Not only are they extremely cheap, but they are filling and delicious. Just thinking about them makes my mouth water. It can be a little intimidating trying to order in Spanish, but everyone was really patient with us. Give it a try. You won't regret it. I don't know how I made it out of Mexico without taking pictures of my tacos, but I did....so here is a picture of us at the beach with our bellies full of tacos.

When I first started planning this trip, I wasn't that excited about Mexico since it is basically our next door neighbor. It didn't feel exotic or adventurous. I also wasn't thrilled about Playa Del Carmen because I thought it wouldn't have the charm we were looking for. Now that we are home, I miss it so much. I fell in love while I was there and we will definitely be back.


xo-Nancy


Thursday, May 29, 2014

Kitchen Remodel: Inspiration

Image via Sycamore Street Press


Hello All!

Since this past weekend was a 3 day weekend, Adam and I decided we were ready to dive head first into our kitchen remodel. We know this will be no easy task, but we are really trying to get our house in tip-top shape before my nephews birthday party in July. Plus this is something we've been talking about since the day we bought our house. We've already made a lot of progress, but it will be about a month (hopefully!!) before I'm ready to show pictures of the new look.

Here are a couple of before pictures from our home listing:


Some people may really like the kitchen in its former state, but I'm not one of them. Here are a few things that really bug me about this kitchen:

1) I despise those ugly brown walls. Not only because it is an ugly color, but it also really darkens the whole room. It is hard to tell in these pictures because of the flash, but just trust me. It is true.

2) Those cabinets. I'm just not a fan of the color wood they chose and the only thing that makes them worse is the matching door pulls. 

3) The light fixtures. They just do not match the time period of the house. They are way too modern for what I'm going for. 

4) The floor. Since we have giant messy dogs, this light grey floor just does not work for us. Plus, you can't tell in the picture, but most of the tiles are either cracked or loose. This is on our list of projects, but I don't think it will be finished until probably next year sometime (if not a little longer).

So there is plenty more that really bugs me about this kitchen, but I won't go on and on about it. I'm sure you get the point. 

Here are some amazing pros to this kitchen:

1) The giant windows. They let tons of light in, but you can't tell because the walls darken it so much
2) Tons of cabinet and counter space
3) A great layout that makes it easy to enjoy cooking.

So that's enough about the current state. Let's move on to the big plans I have for this room!

Since our home is almost 100 years old, I really want to keep an industrial feel without getting too modern. I want an update, but not something that will feel weird in such an old home. Here are a few pictures of what inspires me:

Image via Elements of Style
I absolutely love this kitchen. It is sleek and modern, but not TOO modern. It is rustic and a little industrial and I love it.

Image via Nordic Design
I love the light fixture in this picture. It is fun and interesting and will add much more light than our current fixtures. 

Image via Remodelista


I love the use of plants in this room. It really brings new life and color to the whole space. 

So to wrap this up, here are my goals for our new space:

1) I want to brighten the space
2) I want to incorporate wood and iron elements
3) I want lots of plants!

Check back in several weeks and I should have a progress report for you. Between now and then, expect lots of DIY posts for kitchen projects!

xo-Nancy


Wednesday, May 21, 2014

Etsy Love: Planters

Oh how I love spring!

I don't know about you guys, but for me, spring seems to bring a new burst of motivation for new projects and remodeling. I have been spending tons of time lately in my flower beds and my garden and I've been trying to bring all of that greenery inside so I can enjoy it ALL the time.

Unlike other decor, plants are something special to me. They add more than just color and variation, they bring life inside. Maybe that sounds crazy...I'm not sure. But anyways, one of the fun things about bringing plants inside is finding creative ways to display them!

Here are a few really fun planter ideas I found on Etsy.

How adorable is this fox planter? Perfect for a bookshelf or in a grouping of other plants. 

This dino planter is bright and fun! 


 I've really been getting into industrial type styles lately, so this geometric concrete planter really works with my current style.


And finally, a pretty mid century planter. You can never go wrong with vintage.

These are just a few things that I'm loving on Etsy right now. I also have a few planter DIY projects I'll be posting in the next few weeks, so be sure to check back to see what I've made! If you are looking for a super quick project to hold you over, check out these painted terra cotta pots I made awhile back.

Happy planting!

xo-Nancy


Monday, May 19, 2014

DIY: Industrial Towel Rack


Hello! Today I am really excited to share our latest project with you! It is one of those projects that is fairly easy, not very time consuming, but has a major impact. Definitely my favorite kind of project!

First, let's talk about supplies.

Here is what you'll need:

6- 3 1/2" Black Steel Pipe Nipples
6- Black Steel Floor Flanges with 1/2" openings
6- 1/2" Black Steel Caps
24- 3/4" Screws for Floor Flanges (I also call them "bases")
2+- Mounting Screws
*We used 3, but if you use a longer/shorter board, adjust accordingly :)
Power Drill
Screw Driver
(either/or will do, but the drill makes this job a lot easier

To begin, we first measured where we wanted to place each of the hooks so they would be evenly spaced. Our board (after cutting) was 45 3/8". Since we had 6 hooks, we divided the board into 7ths so that there would be even spacing on both ends and between each of the hooks. Our final measurement was a hook every ~6.5". If you are using more/less hooks or a longer/shorter board, just use the same math as above to come up with your spacing.
If you look closely at the board, you can see the holes for the mounting screws and the markings for where the bases were to be mounted.

We chose to use these screws mainly because they were pretty. You can use whatever you'd like as long as the heads are big enough to not slip through the holes of the bases.
Make sure to put on some good music while you work! We were listening to our Boston record that we are currently obsessed with.

After measuring and marking the board (we set each base on the board and traced the holes so we would know where to drill later), we took it to the bathroom and measured where the studs were. We went ahead and drilled the holes in our board for the mounting screws so we could make sure that the hooks didn't cover the holes. We found that one of the screws would be under one of the hooks, so we knew we were going to have to wait to screw that one down until after the rack was mounted (more on that later). 

Now that we had everything laid out, it was time to start mounting the bases. We just realigned the bases with the marking from earlier and started screwing them down.


You can use a power drill for this part and it will go a lot faster. We started with a screw driver because we didn't have a flat head drill bit, but we ended up "making one" because we were lazy.


After you get the base screwed down, you can go ahead and screw in the other pieces. We went ahead and screwed down all the bases at once before we put the rest of the pieces together.

Here is my other "helper"


You can tell from the picture that one of the bases isn't mounted yet. This is the one that was going to cover one of our mounting screws. We just left it off until we had the whole thing mounted on the wall. We made sure the board was level and then just screwed it into the studs to make sure it wasn't going to fall later. After we assembled the caps and nipples to the bases, we went back with a pair of channel locks and tightened them even further. This step probably wasn't necessary, but we did it anyways.

 Here is the final product!


I'm totally in love with how it turned out! I was worried that the wood wouldn't match our bathroom because we don't really have much natural wood in there, but it was perfect. It added some much needed character to our otherwise boring bathroom. 

So what do you think? Let me know in the comments and if you decide to make one of your own, I'd love to see it!

xo-Nancy